Supplies needed (per chore chart):
Poster Board
Lamination or Contact Paper
Sticky-back Velcro
Markers
Ruler
2 Fabric Pieces approx. 9"x 10" each
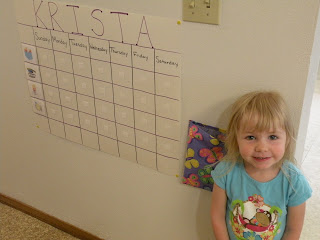
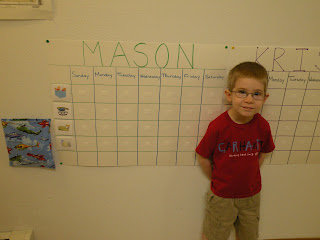
First, I drew out squares in colors they picked. I made 8 columns (7 days of the week plus 1 for the chore), and I did 5 rows. I only have 4 chores for each kid right now, but I left room to add if needed. I figure once they get the hang of these chores I'll gladly add more later. I put one side of the velcro in each square and filled in the days.
I found pictures online representing different chores I wanted the kids to do. Both kids have a toy box for picking up their toys, one for brushing their teeth, and a table setting for helping set the table for dinner. Krista has an additional one for brushing her hair, and Mason has one for making his bed. I spaced them out on a page, printed them out, and then laminated it.
Next I put the other side of the velcro onto the backs of all of the chores, and some stars that I printed out and laminated for them to use when they completed a chore.
I then wrote their name on the top.
Next, I wanted to make pockets for them to put their stars in when they weren't on the chart. I started by cutting the fabric they picked out into 2 pieces, each being 9" x 10". I folded over one edge and sewed a 1/4" seam. This will be the top of the pocket.
After doing this to both pieces, I put them together, wrong sides out, and sewed a 1/4" seam around both sides and the bottom, leaving the top open.
I then turned the pocket right side out. I pinned them up next to their charts making sure they were low enough for them to reach into. Here are the happy kiddos modeling their new chore charts. Ahh, the innocence!
The greatest thing about this chore chart is how easy it is to change the chores. Just print out another picture, stick some more velcro on it, and a new chore is in place. Got to love reusable!


